With Valentines Day just a month away, we are so pleased to have Carlene from Organized Clutter create a seriously awesome Valentine project and give us an easy to follow tutorial.
Hi! I'm Carlene, and I collect, up-cycle, re-purpose and junk garden over at my blog, Organized Clutter.
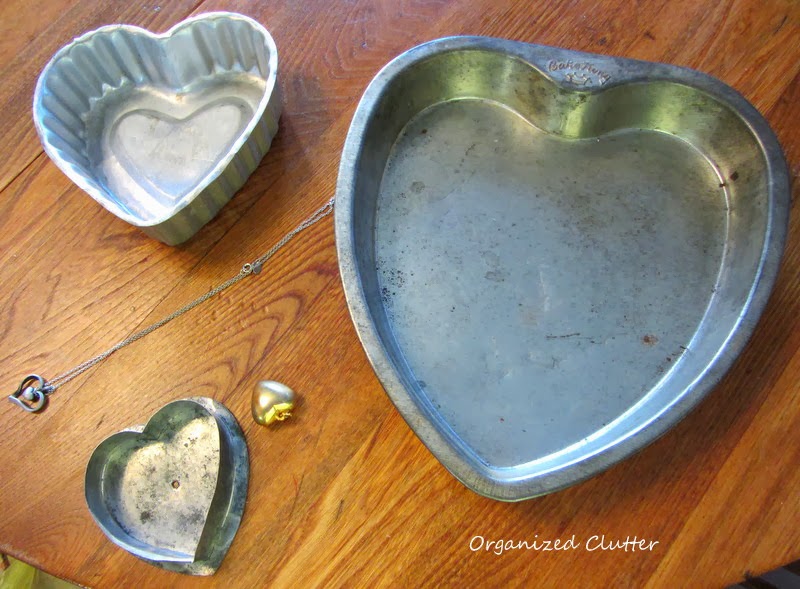
I am happy to be here today at the Inspiration Cafe, to share a Junkin' Jewels Valentine's Day project, that I created from a vintage Bake-King heart shaped cake pan.
I love to create seasonal decor from thrift shop items. Kitchen ware is always plentiful at the thrift shops, so many of my projects use items like these: cookie cutters, jello molds, and cake pans.
Last week I re-purposed the Jello mold, the cookie cutter and the necklace heart HERE.
Last year I made an ice cube tray shadow box HERE.
Today, I am going to make a button heart mosaic in the Bake-King cake pan.
First I glued a row of white buttons around the edge of the heart pan with Elmers Probond Advanced Glue.
Then I started filling in the heart with red buttons of various sizes.
This is my button mosaic before grouting.
I had a container of white non-sanded grout on hand that I mixed up without measuring. I had read on the internet that the grout should be the consistency of peanut butter.
I put on a rubber glove and applied the grout with my gloved hand.
I smoothed the grout, and wiped off some of the grout with a wet sponge. Then I let the grout set up up a bit before I continued removing the grout on the buttons. This was probably the most time consuming part. I used a wet sponge, several wet Q-tips and a bobby pin to scrape and wipe out the grout.
The finished mosaic looks like this.
I am displaying the mosaic on a plate stand in my kitchen.
I want to thank the gals from Inspiration Cafe for the opportunity to share a project with you!


 Springfield Time
 Melbourne Time
 Auckland Time