Friday, November 29, 2013

Inviting Garden Guests

Hello to everyone at Inspiration CafĂ©!  I love being a monthly contributor!  My name is Marci and I blog at Stone Cottage Adventures.  The north side of our front yard is a certified  National Wildlife Federation Backyard Habitat.  Really!  We have a certificate!  You can do the same by providing food, water, cover and places for wildlife to raise their young.  It is so much fun to see all of the critters that stop by for a visit.  I've begun a new series of posts to show you our Garden Guests.  If you are interested in attracting feathered friends to your yard, here are some suggestions! 

Birds appreciate supplemental food and fresh water, especially in fall and winter. You can stop feedings in summer, but a continuing supply of food will encourage birds to nest and raise young in your yard. It's also important to always have water available near your feeding stations, especially during the winter when other water sources are frozen solid.


Chickadee

Considerations: different species feed at different levels; Place food near shrubs or trees so birds will have the security of an escape nearby; Since birds do not have teeth, they need grit in their gizzard to help grind down seeds. In the winter, it may be hard for them to find tiny pebbles and grit. Help by placing coarse sand or crushed egg shells near the bird feeder.
  photo 
ddcf98f0-d85b-411c-9046-c4051113347d_zps4e89c039.jpg


 Safflower Seeds - a good choice if you want to invite cardinals to the backyard without the messy freeloaders – few birds(or squirrels) like safflower. Unlike sunflower seed, safflower seeds aren't attractive to bossy birds such as grackles and blackbirds.

Black Oil Sunflower Seeds - energy-packed seeds that are a favorite of a wide variety of bird species. If you only have one feeder available, fill it with black oil sunflower seeds.

 photo 
7871bb43-a228-4306-a99f-8bbf1b146a40_zpsaa9587ce.jpg
Peanuts - keep blue jays from intimidating smaller birds by serving peanuts in a separate feeder. The jays will focus on that feeder and be less aggressive overall. Buy shelled peanuts if you want less mess in your yard
 photo 
DSCN3384_zps37e4b6b3.jpg
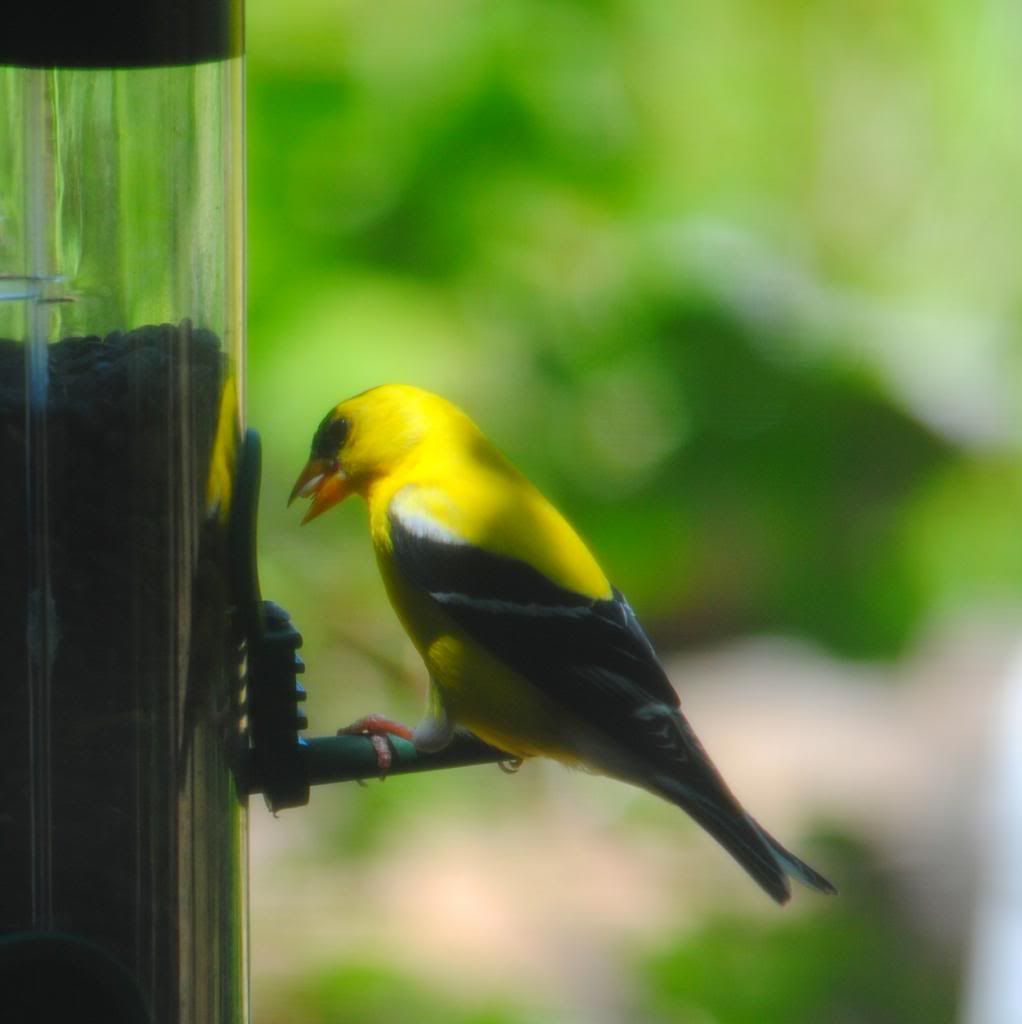
Nyjer (thistle) Seed - enjoyed by finches and other species that include juncos, spar-rows, chickadees, and even woodpeckers... use tube feeders with perches at several levels.
Suet - like catnip to wood-peckers and nuthatches. ... buy packaged suet cakes, often infused with seeds and fruits, or purchase raw suet from a local butcher. The birds aren't particular.
 photo 
9d0068f2-3c83-455b-9dae-c6a797ba7bac_zps6250a13d.jpg
Cracked Corn - the fast food of bird feeding - high in calories and inexpensive ...may have problems with undesirable guests.
Mixed Birdseed - quality counts when choosing a wild birdseed mix... look for a high percentage of sun-flower seeds and peanuts. Don't buy cheap mixes that contain milo, wheat, red millet, or grain by-product.
 photo 
19904ca1-10bd-4838-a267-e74333900b68_zps3f2e5979.jpg
(While the photos in this article are mine, the content is from Benton County Master Gardeners' October Newsletter, used with permission.  If you are curious about my habitat garden and more of the critters that visit, please view my Gardening Page!)
 ;-)  -Marci

Thursday, November 28, 2013

Pin. Make. Repeat. Free Printable - MotherCrafter

    Who doesn't have a Pinterest obsession? 

Here it is a new free printable to display your addiction :) 

Pin Make Repeat

 Vanina

You can find me on Facebook, Twitter, Pinterest and Bloglovin!  

Tuesday, November 26, 2013

Paint Dipped Soup Cans - Stow & Tell U

Hi All, my name is Amy and I blog over at StowandTellU. I'm so excited to be over at the Cafe today. I'm still craving some of those soup and sandwich recipes from the most recent Inspiration Cafe series, how about you? I plan to try them all, but I'll be honest, I'm not the best cook! Sometimes I'm better off opening a can of soup, rather than making homemade. Speaking of cans of soup, I have a little storage/planter idea for your herbs. It involves a few empty cans of soup and some paint dipping. Have you heard of paint dipping? It's a rather new to me, but Tara at Suburble has some gorgeous gold dipped ornaments, and that's what gave me the idea. Thanks, Tara!!
   
Paint Dipped Soup Cans with splatter paint texture-StowandTellU 

My dipping is a little more on the rustic side. What do your think?
  
 Paint Dipped Soup Cans with splatter paint texture-StowandTellU15 

I used some small soup cans, some larger soup cans. Oh, and a coffee can, too 

   Soup can herb pots-poke or drill holes in the bottom of the smaller cans 

I drilled some holes in the bottom of the smaller cans. I could have poked the holes with a small awl, as well, but I drilled these. I then replanted our herbs into the smaller cans. I used a plastic planter's pot for the inside of the coffee can. 

Soup can herb pots-tape cans of and paint
    

 I wrapped some painters tape around the center of the larger soup cans. I fully wrapped the center of the coffee can, too, after I took this picture. I applied some craft paint to the top and bottom sections. I also mixed in a little water and baking soda, which I think help to make the paint stick to the metal of the can. I let the paint dry. It looked pretty cool, but I thought it need a little something else. So, I decided to give it a speckled paint splatter texture on top. I removed the tape before the paint dried, and BOOM!! Pretty cool. Then I gave the painted parts a coat of paint wax, for good measure.
  
Paint Dipped Soup Cans with splatter paint texture-StowandTellU
Paint Dipped Soup Cans with splatter paint texture-StowandTellU10a
   

Paint dipped and speckled soup cans...and a coffee can, too.
Another project to add to my kitchen update. Come on by and check it out anytime!
Once again, I'm so glad to be hanging out at the Cafe, today. 

 Thank you for having me by ~ Amy!!

Sunday, November 24, 2013

'Tis the Season - Christmas Goodies.....

Hey Everyone,

I hope you're all getting ready for Christmas, we've started crafting already!!!

Today I wanted to show you a few ideas that double not only as Christmas goodies for your family but also as gifts for friends and neighbours...

All so simple and so fun... Just click on the image to take you to the tutorial.


My husband's Grandmother passed this biscuit recipe down to me when I got married. It has to be the easiest biscuit recipe ever but be warned, it makes heaps!!! And they are gobbled up really quick too! We like to give away batches as gifts and the kids love to decorate them..

http://www.northshoredays.com/2012/12/grandmas-german-biscuits.html


Last year, my kids and I made these hearts - so quick and child friendly! A lovely gift on anyone's tree.
http://www.northshoredays.com/2012/12/glitter-heart-decorations.html


We also whipped up these easy glitter balls. The kids personalised theirs while I made a few simple ones. Great to share with friends and family alike.
http://www.northshoredays.com/2012/12/glitter-ball-decorations.html

If you like to make jewelry then this Sweet Snowman Pendant is just the ticket for the holidays. You can also whip up a pair of earrings or even a few beaded ornaments....
 http://inspirationcafeic.blogspot.co.nz/2012/12/sweet-snowman-pendant-necklace.html

Thanks for stopping by, I hope you try a few of these ideas this year.

Please join us again next week for the next installment of our 'Tis The Season series...


Take care


Saturday, November 23, 2013

Saturday Weekly Wrap Up 44 & 45

Hey everyone,

Did you all miss the wrap up last weekend? 
Sorry it never happened, but today I will include last weeks posts along with our recent posts, so you wont miss out on one bit of awesomeness...

Here we go....


Kitchen iPad Holder
DIY Plaster Ornaments
Mini Christmas Wreaths
The Candy Cane Bracelet


Danni at Silo Hill Farm
 HAD TO HAVE IT: 1920s Art Deco Light Cover
Some Thanksgivingness


Heather at The Beating Hearth
Make your own cloth napkins....for the feast, of course!
Vanilla Shortbread Cookies with Chocolate Peanut Butter Frosting
Pre-Feast activity for kids...what to do on Thanksgiving
Pre-Feast Activities for kids part deux...Thanksgiving fun
 Homemade Christmas Ornament...Thanksgiving Fun


Creamy Chicken Bake
Reader's Digest Feature on RD.com


Natalie at NorthShore Days
Stacked Lampwork Pendants


Our wonderful contributor's posts...
'Tis The Season

 with Christmas Crafts From The Past


Have a great weekend

xxx
 Nat, Mary, Heather, Danni and Mel
 
Inspiration Cafe is looking for guest posters and contributors. If you would like to guest please let us know, we would love to have you. If you would prefer a feature instead, feel free to drop us a line. New or old posts welcome.
 

Thursday, November 21, 2013

Homemade Lavender Peppermint Body Scrub - Grace Grits and Gardening

lavender peppermint body scrub
This is my favorite body scrub made with ingredients from my kitchen and garden. Quick and easy, this homemade lavender and peppermint body scrub makes great gifts and will keep for weeks without refrigerating.

...not that it will last that long...

Ingredients

1 cup coconut oil
1 tablespoon grapeseed oil
1/2 tablespoon ground fresh lavender
5-6 drops peppermint essential oil
1 cup granulated sugar

Method

Melt coconut oil in microwave.

Mix sugar, lavender and essential oil into coconut oil.

Drizzle grapeseed oil and mix. The grapeseed oil gives the scrub a slight sea green tint. (not that obvious in the picture)

Pour into small containers.
I'm using my Grace Grits travel candle tins (empty after burning the candle down) 
Let harden for a few hours.

The scrub's thick, rich consistency is perfect for using in the bath or shower, and the peppermint oil and lavender combines with steam to open sinuses. This is a great way to start or end your day.

talya

Grace Grits and Gardening
Farm. Food. Garden. Life


Wednesday, November 20, 2013

How to Make a Fleece Scarf in 5 minutes for $2.00 - A Few Miner Adjustments

How to Make a Fleece Scarf in 5 minutes for $2.00

End the War…Just Make the Scarf

There’s this scarf...
just an ordinary green fringed fleece scarf from Old Navy.
I may have paid all of $2.00 for it about 10 years ago. There are also these 2 boys...
cute, smart, competitive boys. 
And when that scarf comes out for the winter they argue over that scarf.  It is always their turn to wear it, never the other person’s. And so the fighting ensues.
This year though, I decided to make a few Miner adjustments. I couldn't stand to listen to one more second of the green scarf war. And I couldn't bear to see the wrestling match that was brewing.
So I told those cute, smart, competitive boys to get in the car.
We headed to my favorite Joann’s Fabrics where they picked out their very own warm and fuzzy fleece. And boy oh boy were they excited! This in turn made me feel like mom of the year!
Materials Needed:
  • ¼ yard fabric that is 54 inch long (the width of the fabric on the bolt)….it cost all of $2.00 each
  • Scissors
  • Tape measure
  • Masking Tape
Steps:
Tip before starting: Fold the fabric in half and made sure all of the edges were straight by trimming it.
{1} Measure 5 inches up from the edge of the fleece.
{2} Put tape across the fabric at the 5 inch mark.
{3} Have your cute, smart, competitive child cut pieces of fringe up to the tape.
{4} Repeat steps 1-3 on the other end of the fleece.
{5} Remove tape and enjoy your scarf.
Baby, it’s cold outside. Why not make yourself a warm, fuzzy fleece scarf of your very own? 

Tuesday, November 19, 2013

Furniture Fashionistas - Lorraine from Miss Flibbertigibbet

I am so excited to share here at the Inspiration Cafe!! I have NEVER done a guest post before…….. But after this stellar appearance…..…I'm sure my inbox will be full of enticing offers to guest post all over blogland….right? I'll be polishing my resume while you read…... I sell Miss Mustard Seed Milk Paint (here)….…thought I'd better say that first! But, I wouldn't sell it if I didn't love it and I do! There are 6, yes SIX new colors of MMS milk paint that came out this year! I have been working my way through the first 3 and am waiting to get the three newest this month. Today I am going to show you a project done in Artissimo but first I'll show you the previous projects…….   Eulalie's Sky……(see post) milk-paint-closeup-4   Dried Lavender…..(see post) MMS-dried-lavender-8
Now, you get to be the first to see my project in Artissimo!! I started out with a small, maple finished drop leaf side table. Cute, but run of the mill for sure…. milk-paint-table-before
And just a bit dirty I see….that's what happens when you spend too much time in my Pile-O-Crap area……... First I gave it a cleaning and a light sanding…who knows what"s stuck on there! Then two coats of MMS Ironstone with some bonding agent added. I added stripes with my trusty Frog Tape….. milk-paint-table-artissimo-1
 A word about Frog tape….WORTH EVERY PENNY!!! I'm Scots/Welsh background primarily and let me tell you….that means I can squeeze a penny 'til it cries for mercy….seriously…... I resisted the Frog Tape for a long time….too pricey…..but after several striping disasters which required more fixing time than doing time….I bought a roll. Seriously…..the BEST STRIPES EVER!!! Mixed up some Artissimo and painted…..I removed the tape and LOVED the look!! Here it is before any other work….. milk-paint-table-artissimo-2  
I gave it a light sanding all over with a Scotch Brite….love those things for finish sanding…... I did a bit of distressing but not too much. I let some of the white undercoat show through. Two coats of Miss Mustard Seed Furniture Wax….the best, really….so creamy, no odor, makes my hands so nice and soft!!!   Artissimo milk-paint-table-artissimo-3
Flaps up……. milk-paint-table-artissimo-5
 Or flaps down….it's too cute!!! milk-paint-table-artissimo-6
What do you think??? milk-paint-before-after-artissimo  
Big thanks to the great gals at Inspiration Cafe for letting me guest post!!!  
Lorraine Finkbeiner
missflibbertigibbet@gmail.com