Sunday, April 28, 2013

INSPIRATION CAFE RECIPE LINK PARTY #1

It's time for the Inspiration Cafe's first ever link party!  
Please join us in linking up some recipes that are special to 
you or maybe even a recipe or two from your heritage.  

It doesn't have to be a new recipe and we don't really have 
any rules about following.  We would ask that you be kind and 
show some comment love to some of the other links. 

The Inspiration Cafe girls have all shared some special 
recipes that are meaningful to us and now 
we'd love for you to share some of yours.  


When you link up your recipes, you are also giving us permission 
to share them on Pinterest, Facebook, our own blogs, as well 
as here at the Inspiration Cafe.  We will ALWAYlink back to 
your original post and make sure that proper credit is given to you!

We thank you for visiting the Inspiration Cafe and always appreciate 
our friends, followers, commenters and regular contributors!  
We will be sharing some features here on Monday, 
May 6th, so be sure to check back then!
 

Saturday, April 27, 2013

Saturday Weekly Wrap Up 15

Happy Saturday Everyone,
We hope you've all had good weeks and looking forward to the weekend.

Come on and check out what we have been doing on our blogs this week:

Tried & True Tuesday ~ Summer Spinach Strawberry Salad
Crazy Cake in a Mug ~ No Eggs, Milk or Butter, Ready in Minutes


Heather ...The Beating Hearth Haute Couture by Heather...Tongue in Cheek Tuesday
Nightingale The girl Ninja Turtle
Chopped!


Natalie...NorthShore Days
Up-Cycled Painted Tin Cans
7th Bead Soup Bead Party - Reveal
 

Danni ...Silo Hill Farm

Danni was also selected to be a Party Co-host for  Fluster Buster's Creative Muster Party! You can still link up if you're quick...
 
Danni is also co-hosts a BLOGLOVIN' BLOG HOP on a Thursday so head on over and add your blog...


It was Mel's turn at the Cafe this week, she ended our Traditional Foods series with a very special recipe... 
ANZAC Biscuits

We have had so much fun with this series. Thank you every one for reading along the way, we really hope you will try one of our recipes too.

Don't forget we have our very first LINK PARTY happening on Monday! So please come by and link up a traditional food or family favourite, any recipes that are special to you.

We cant wait to read them all...


xxx
 Nat, Mary, Heather, Danni and Mel
 
Inspiration Cafe is looking for guest posters and contributors. If you would like to guest please let us know, we would love to have you. If you would prefer a feature instead, feel free to drop us a line. New or old posts welcome.
 

Friday, April 26, 2013

CARDAMOM COOKIES - KARDEMOMMEKAGER

Cardamom is one of those spices that was kind of  a mystery to me for many years.....until I had Cardamom Cookies.  Oh my!  Now I find myself trying to sneak a little cardamom into more of my baking.  I'm Danish, and we do love our baking, so today, I'm sharing my Cardamom Cookie recipe with you.  (In Danish it's Kardemommekager....just so ya know!)
They're kind of pretty with their crinkly sugared tops! 
 This is one of those easy recipes where you mix it all in one bowl...sweet!  Here's what you need....
 I should make a quick note here...this recipe does not use whole wheat flour.  Wheat Montana is my favorite flour in the world and I loved it so much, I bought a flour jar from their store!  
Ingredients:
  • 1 egg
  • 1 Cup sugar
  • 1/2 Cup melted butter
  • 1/2 tsp. baking soda
  • 1 tsp. cardamom    
  • 1 tsp. cinnamon
  • 1 1/2 Cups all purpose flour
Mix all ingredients in a bowl.   Roll into 1" balls.  (I just use a 1" cookie scoop.)  Place 1 inch apart on a lightly greased cookie sheet Dip a small glass or jar sugar and flatten cookie. Bake at 350 for 10-12 min.

Really, they are that easy to make.  Here is a quick tip...to get the sugar to stick to the bottom of the jar/glass you are using to flatten the cookies with, just flatten the first cookie and then dip the jar in the sugar.  (It will pick up enough moisture from the cookie to get you started.)
 I flattened these to just about the diameter of a 50 cent piece.
 If you want a crisper cookie bake them a little longer.  I baked mine about 10 minutes, until they were just lightly brown on top.
 I love these cookies!  Cardemom is wonderful spice and will fill your house with a lovely aroma when you bake these.  

I'm linking this recipe to this fun party today.....

 (Stop by and show Marilyn some love!)
And this great party  which begins on Monday.....
The Inspiration Cafe Girls are having their first link party and we'd love it if you'd come link up a recipe that has special meaning to you on Monday April 29th.   We'd love it if you would!
 

Thursday, April 25, 2013

Fleecie Pinafore Dress - Mammy Made

Adele is here from Mammy Made, today...


Hi everyone. I'm Adele and I live in England with my two gorgeous babies, Leyla who is 4 and Naomie who is 2. I am so excited to be contributing to Inspiration Cafe again today!


I usually blog over at Mammy Made. I like to write about crafting, cooking and homeschooling, although I am only homeschooling part time at the minute. I have tons of tutorials on there so come by and say hi, I’d love to see you! 


Today I'm going to be showing you how to make this lovely fleece dress for the little girl in your life. It is perfect for Spring (although Spring hasn't exactly sprung yet here in England. What is that all about?!)

I have so much fleece in my stash, I seriously need to find ways to use it all up without just making nappies out of it all. I made a fleecie pinafore dress for Leyla a while back but it was getting too short so I knew I wanted to make another, longer one. I had this gorgeous material leftover from my nappy making days and I thought it would make a lovely dress. Turns out I was right :)

It was so easy aswell. It took me an hour from start to finish! To make one all you need is a dress you like the fit of to draw around and some fleece that you like the look of. I added a contrasting panel around the bottom because I made it too short initially but it would look lovely in just one pattern too!


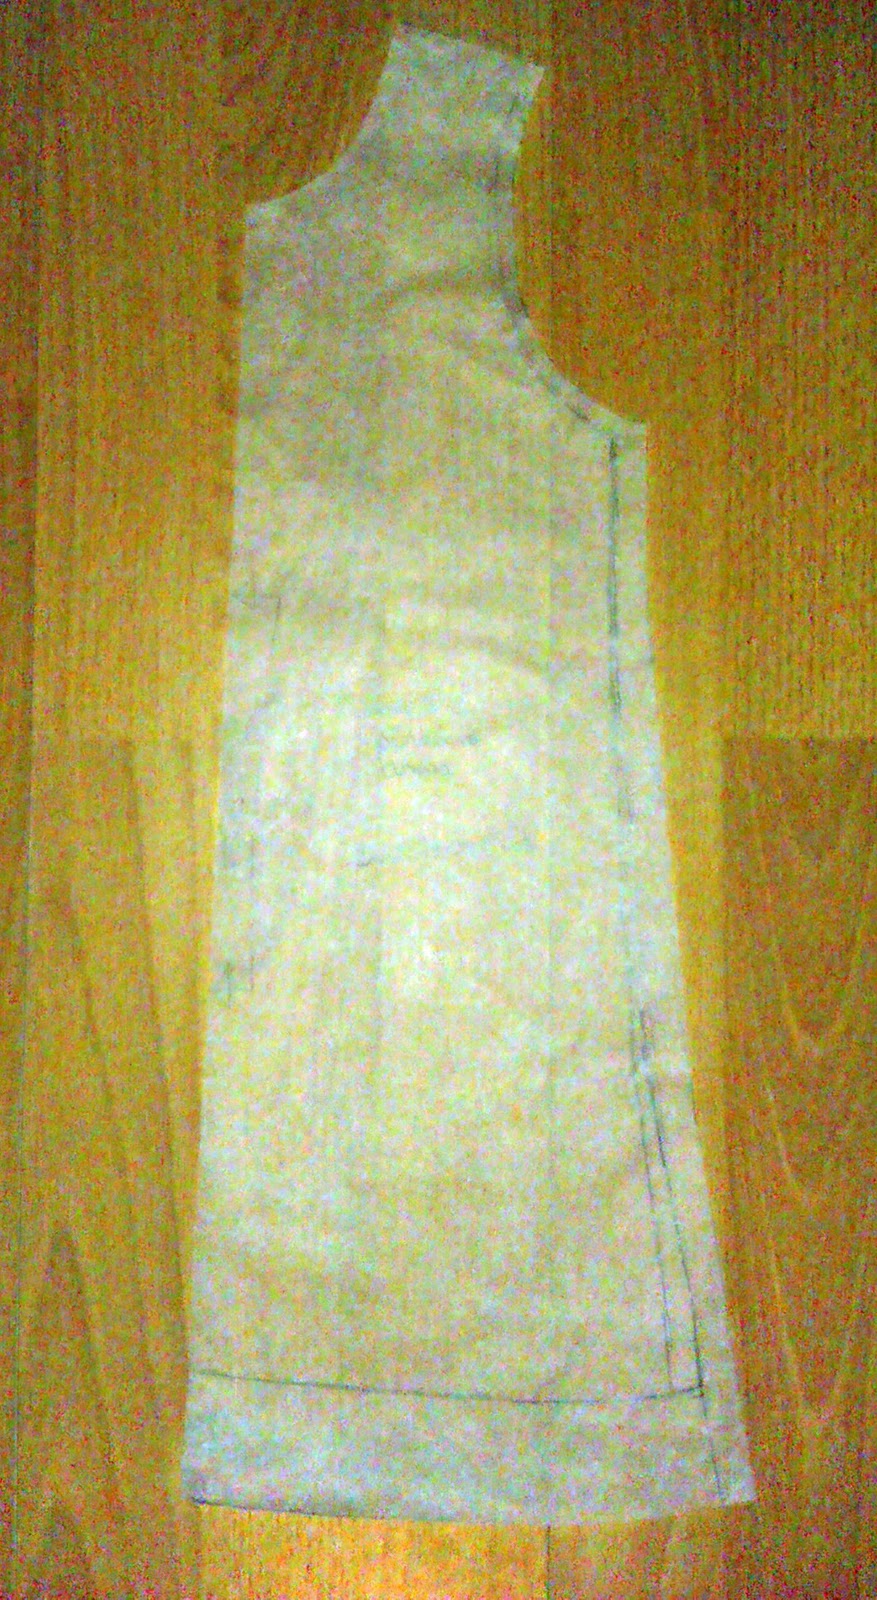
To make your pattern, fold your dress in half and lay it on some pattern paper with the fold against the edge of the paper. Draw around, then add a seam allowance all around the edge. I use a 1/4" seam allowance so I added 1/4" all around the edges. Add a little more to the bottom if you'd like a wider hem. I made the back and the front the same but you can make the front neckline a little lower if you prefer.


When cutting out your pieces, make sure the stretch goes across, not up and down and make sure to lay the pattern on the fold. When you have your pieces cut out, lay them right sides together and pin the shoulders and side seams together.


Stitch them together. I used a straight stitch and then a zigzag stitch right next to it.


I folded over the neck and armhole hems and stitched them with a zigzag stitch to allow for stretch. Ignore the fact that my neckhole is pretty wonky. I obviously stretched it a bit while sewing. It doesn't look as bad when she has it on, honestly haha!


To make the contrasting panel along the bottom, I laid out the dress, folded, on some folded fleece, making sure the stretch went across, not up and down. I added a 1/4" allowance but I should've added 1/2" to allow for both sides of allowance. I ended up having to use a 1/8" allowance when sewing to make up for the fact that I'd cut it too small! Sew up both sides of your contrasting panel.

I don't have a picture of this next step but basically, lay the dress and the panel so they are right sides together and stitch all along the two raw edges to attach. I folded the panel down then stitched the seam allowance up with a straight stitch. It looks so much more professional this way and the panel will lie so much nicer than if you miss this step. Fold up a hem, however much you left when cutting it out, and stitch it. I used a straight stitch since it won't need to stretch really.


I hope you all enjoyed this tutorial. Thank you so much to everyone behind Inspiration Cafe for letting me contribute again. It's been fun!

Sunday, April 21, 2013

Heritage Series - ANZAC Biscuits - Mellywood's Mansion


Hi Guys,

Mel from Mellywood's Mansion here, today I am sharing a recipe that represents the pride of our nation ANZAC Biscuits.

ANZAC stand for the Australian & New Zealand Army Corps, these biscuits were created and baked by the wives and mothers of our "diggers" (The name we call our Aussie soldiers) . They have a long shelf life and were sent as care packages during the first and second world wars.

ANZAC day is the 25th of April, on this day in 1915 the Aussie diggers, many of whom were barely men, landed in Gallipoli in an effort to defeat Turkey. 8000 Aussie diggers lost their lives that day, fighting for the freedom we enjoy today and the remaining men were forced to retreat. However, it brought about the birth of Australia, and a new federation had come into it's own.

ANZAC Biscuits

1 cup of plain flour
1 cup of brown sugar
1 cup of rolled oats
1/2 a cup of dessicated coconut
125 gr of butter
2 Tbs of Golden Syrup (For those unable to get it you can make your own very easily see here for that recipe)
1 TBS of water
1/2 tsp of Bicarb Soda

Sift the flour into a bowl and ad the other dry ingredients except for the bicarb soda
Melt the butter, golden syrup and water together


Once melted add the bicarb soda which will froth and should look like this


Roll into walnut size balls place on a greased tray then flatten with the back of a fork


Bake in a preheated oven at 170 degrees Celsius for around 15 minutes.


Then it's time to knock off for smoko , grab your billy tea and enjoy a biccie or two (take a break for afternoon or morning tea).

In honor of those lost diggers, we remember them in a dawn service and I will leave you with the Ode of Remembrance :


They shall grow not old, as we that are left grow old;

Age shall not weary them, nor the years condemn.

At the going down of the sun and in the morning

We will remember them.


Lest we forget


Don't forget next week is our first link party, we'd love for you to share your heritage or special dishes with us.

Thanks for reading,

Mel xo


Saturday, April 20, 2013

Saturday Weekly Wrap Up 14


What a week its been! Thankfully its Saturday again!

Our thoughts and prayers go out to Boston and Texas this week. You are all in our hearts during this tragic and difficult time.


 We have kept ourselves busy, wanna see what we've been up to?
Tried & True Tuesday ~ Texas Caviar (Salsa) 
JalapeƱo Tuna Salad Melt


Natalie...NorthShore Days
  Summer Days at the Beach
Condensed Milk Cookies

Heather ...The Beating Hearth
Part 8 How to Quilt From The Very Beginning...Leaders and Enders
Lots of hugs, kisses and listening.


Danni ...Silo Hill Farm
Silo Hill Farm Soup
 
Danni is also co-hosts a BLOGLOVIN' BLOG HOP on a Thursday, so be sure to add your blog...


It was Danni's turn at the Cafe this week, continuing our Traditional Foods series.  She shared a seriously delicious Danish treat with us


We have LOVED doing this series and we hope that you will be linking up at our  Traditional Foods link party in 2 weeks time .  It's our very first link party at the Inspiration Cafe and we want to see some recipes from your heritage!


xxx
 Nat, Mary, Heather, Danni and Mel
 
Inspiration Cafe is looking for guest posters and contributors. If you would like to guest please let us know, we would love to have you. If you would prefer a feature instead, feel free to drop us a line. New or old posts welcome.
 

Thursday, April 18, 2013

Papaya-Cilantro Smoothie - Grace Grits & Gardening

Hey everyone, it's time for Talya from  Grace Grits & Gardening to share a fantastic healthy smoothie recipe with us today....

In Texas, we love our cilantro. In everything.

This smoothie is lactose-free, gluten-free and vitamin-loaded! The hint of cilantro provides a refreshing clean taste.

Papaya-Cilantro Smoothie

1 cup frozen cubed papaya
1/2 cup frozen banana
1/2 cubed watermelon (I used fresh)
1/2 cup fat free Lactaid milk (more if too thick)
handful of cilantro (approximately 2 Tablespoons)
1 teaspoon zip code honey

Blend.

That's it!


Health benefits of cilantro (known as coriander in Asia):
  • Rich in antioxidant polyphenolic flavonoids and essential volatile oils;
  • High in dietary fiber which helps reduce bad cholesterol and increase good cholesterol levels;
  • Rich in several vital vitamins including folic acid, riboflavin, niacin, beta carotene, vitamins A, K and C; and,
  • Good source of minerals such as potassium, calcium, manganese, iron and magnesium.
Zip code honey:
Local honey from your zip code will aid in seasonal allergy relief. Honey is a natural immunity builder used to remedy ailments such as cuts and burns, hangovers, sore throats, and sleeplessness. 

I buy local North Texas honey from Bee True Products. Search the Local Harvest website for sustainably grown produce in your area, including honey.

Delicious. The honey and the smoothie.

talya


Wednesday, April 17, 2013

How To Make a Duvet Cover - A Few Miner Adjustments


Recently, after posting some pictures of my master bedroom, I got many emails asking about my duvet cover.
Where did you get that duvet?
Did you make that duvet on your bed?
Who made your bedspread?
If you can believe it....I am the maker of this duvet cover.
Yep. This little semi-city gal turned mountain dweller can sew a mean straight line.
My mom (she rocks) also helped me with this project about 3 summers ago.
Finding the perfect comforter design in stores or on-line was an impossible task.
After scouring the special order fabric at the local fabric store everyday for two weeks, I finally found the perfect pattern and ordered it.
Now here is the kicker….I get bored easily.
I know what you are all thinking...
"You, Trina? Bored? Constantly changing your mind? I never would have guessed it!"
But it's true. So while I waited for my lovely fabric to come in I started to worry that I wouldn't like it anymore.
2 weeks went by.
Then 3 weeks went by.
Finally the call came that my fabric had arrived. (Secretly...I almost totally forgot I ordered it, it took so long. I blame Mommy Brain.)
Luckily, no Miner adjustments were needed for this project. I still loved it.

I really should seek some professional help for my indecisiveness.
Any-who...

Supplies Needed:

1 flat king sized sheet (72" wide x 84" long)
Fabric (5 yards)...that measures 54" x 180"
Sewing Machine
Pins
Ruler
The fabric is only 54 inches wide, so we had to place two pieces on top of the sheet side by side to make it the correct width.  Line up your pattern and pin the two pieces together up the middle.
 (You have not pinned it to the sheet yet).

After you sew it up the middle, make a hem along to bottom edge of the fabric 
(this will stay open to put in a comforter).

Next, pin the rights sides of the sheet and fabric together.
Sew around the 3 sides leaving the bottom open to put in your comforter.
Cut the top 2 corners at a diagonal above the seam line 
(this makes the corners more crisp and pointy when it is turned right side out).
Turn it inside out and put in your comforter.

Homemade Duvet in about 3 hours


There was even enough fabric left over to make the decorative pillow. Yippee!
3 years later, I am still in love this fabric.

Sweet Dreams!
{Trina}